

Access 2013
Creating Reports
Printing and saving reports in Print Preview
While you can print reports using commands in the Backstage view, you can also use Print Preview. Print Preview shows you how your report will appear on the printed page. It also allows you to modify the way your report is displayed, print it, and even save it as a different file type.
Click the buttons in the interactive below to learn about Print Preview.

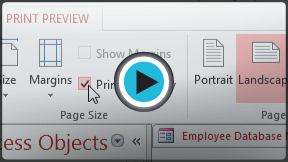
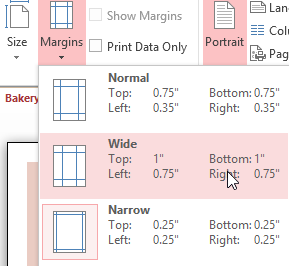
Page Size Options
With the Page Size options, you can set the width of the margins on your report.
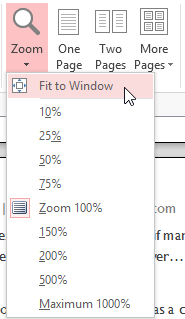
Zoom Options
With the Zoom options, you can decide how much of the report you would like to see on screen. You can also opt to view multiple pages at once.
Close Print Preview
Click here to exit Print Preview mode.
Click the Print command to print your report.
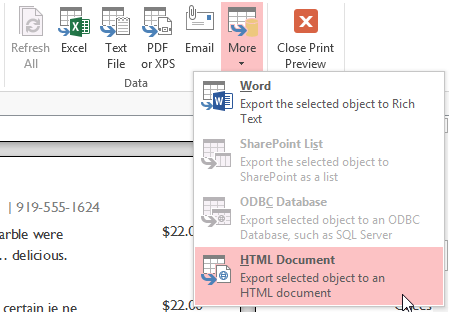
Export Options
The Export Options allow you to save your report in another format. This makes it possible to view your report in other programs.
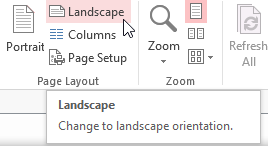
Page Layout Options
Here, you can change the orientation of your report. Select either portrait (tall) or landscape (wide). You can also create columns or click the Page Setup command for more layout options.
To print a report:
- From the Home tab, click the View command, then select Print Preview from the drop-down list. Your report will be shown as it will appear on the printed page.
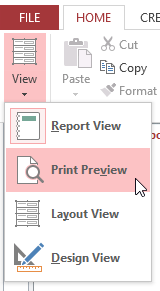 Switching to Print Preview view
 - If necessary, modify the page size, margin width, and page orientation using the related commands on the Ribbon.
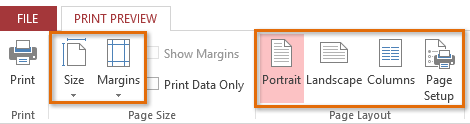 Page setup commands in Print Preview
 - Click the Print command.
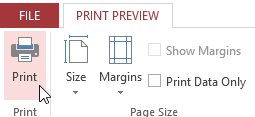 Clicking the Print command
 - The Print dialog box will appear. Set any desired print options, then click OK.
- The report will be printed.
Saving reports
You can save reports in other formats so they'll be viewable outside of Access. This is called exporting a file, and it allows you to view and even modify reports in other formats and programs.
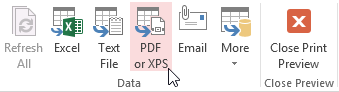
Access offers options to save your report as an Excel file, text file, PDF, HTML document, and more. Experiment with the different export options to find the one that best suits your needs.
To export a report:
- From the Home tab, click the View command, then select Print Preview from the drop-down list.
- Locate the Data group on the Ribbon.
- Select one of the file type options, or click More to see options to save your report as a Word or HTML file.
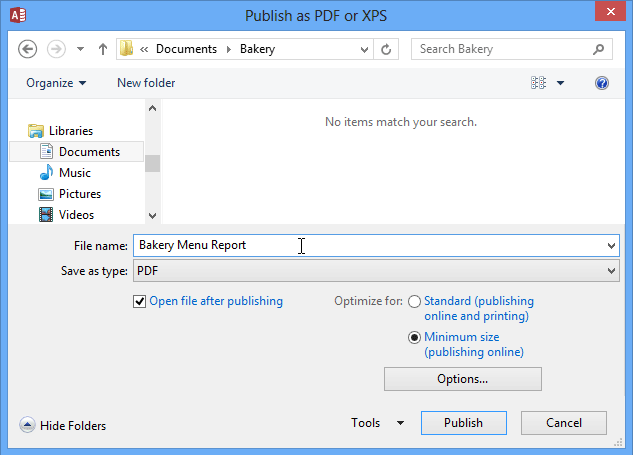
 Choosing an export option
 - A dialog box will appear. Select the location where you wish to save the report.
- Enter a file name for the report, and click Publish.
 Exporting a report
 - A dialog box will appear to notify you that your file has been successfully saved. Click Close to return to your report.
Some export options will cause the Export Wizard to appear. Simply follow the instructions to export your report.
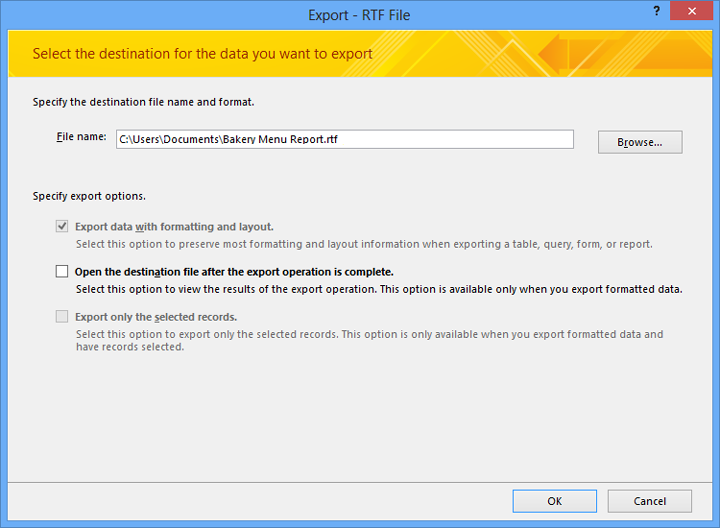 Using the Export Wizard


