Word 2003
Bulleted and Numbered Lists
Introduction
By the end of this lesson, you should be able to:
- Create bulleted lists
- Create numbered lists
Bullets and numbering
Word lets you make two types of lists: bulleted and numbered. Bulleted and numbered lists help to simplify steps or items to the reader. Teachers often use bulleted lists to highlight important pieces of their lessons. Manuals often include numbered lists to assist readers in step-by-step instruction.
A bullet is usually a black circle, but it can be any other symbol used to highlight items in a list. Use bullets to list items that do not have to be in any particular order.
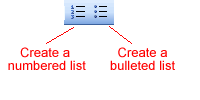
Numbers (or letters) are used when information must be in a certain order. You can use the default Bullets and Numbering settings by clicking on the appropriate button on the Formatting toolbar.

Create bulleted and numbered lists
To create a bulleted list:
- Click the
 Bullets button on the Formatting toolbar.
 - Type the first item on your list, and press Enter.
- The next line will begin automatically with a new bullet.
- Type the next item on your list, and press Enter.
- When your list is complete, press the Enter key twice to stop the bulleted list.
To create a numbered list:
- Click the
 Numbering button on the Formatting toolbar.
 - Type the first item on your list, and press Enter.
- The next line will begin automatically with the next number.
- Type the next item on your list, and press Enter.
- When your list is complete, press the Enter key twice to stop the numbered list.
Review the following tips to help you manage your numbered or bulleted lists.
- Remove a bullet by placing the insertion point to the right of the bullet or number and press backspace (you will not be able to place your insertion point to the left of the bullet).
- If you want to change a bulleted list to a numbered list (or vice versa), select the entire list and click the appropriate button.
- To create a line break between items in a bulleted or numbered list, place your cursor where you want the line break and press Shift + Enter.
The Bullets and Numbering dialog box
Word offers you many other options for your bullets and numbers, other than the default that you have seen so far.
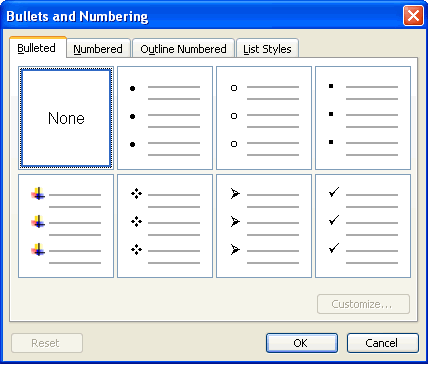
You can view the type of bullets and numbers available to you by opening the Bullets and Numbering dialog box.
- Select the text you want to turn into a list.
- Click Format on the menu bar.
- Select Bullets and Numbering. The Bullets and Numbering dialog box appears.
- Click the Bulleted tab to view all bullet options, and click the Numbered Tab to view all number options.
- Select which kind of bullets or numbers you want, then click OK.
The Bullets and Numbering dialog box also offers you Outline Numbered options. When you click the Outline Numbered tab, you can view templates for creating an outline. The List Styles tab allows you to create your own list style using similar alignment, bullets, and characters.

Challenge!
- Download and save the Cover Letter Word document to complete the challenges below.
- Open the document.
- Read your second paragraph.
- Delete the sentences you wrote listing the skills that qualify you for the job.
- Create an indented, bulleted, or numbered list of the skills that qualify you for the job.
- Save and close the document.


