Word 2000
Using the Insertion Point
Introduction
By the end of this lesson, learners should be able to:
- Maneuver the insertion point
The Insertion Point
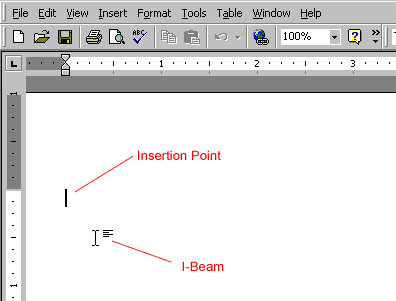
The insertion point (also called a cursor) is the blinking line in your document that indicates where text is inserted when you type. There are several ways to move an insertion point.
The I-beam shows you where your mouse pointer is. The blinking insertion point shows you where your next word will be once you start typing.
When you are in a Word document, your
pointer changes from an arrow (![]() )
into an I-beam (
)
into an I-beam (![]() ).
).
Once the pointer leaves the Word document to perform a
Windows function, it changes back into an arrow. ( ![]() )
)
Notice the line that indicates the end of your document. You cannot move your insertion point below this line.

Moving the Insertion Point
To Move the Insertion Point:
- Use your mouse to move your insertion point anywhere
within the document. Move your mouse until the I-beam is where you want
your insertion point to be and click.
OR - Use your arrow keys to move your insertion point up,
down, left, or right. These movements move your insertion point one space
or line at a time. This method is especially useful if you only need to
move a few spaces or lines back in a document to make a correction.
OR - Hold the Ctrl key and press up or down arrow
keys to jump up or down a paragraph at a time.
OR - Press Page Down (PgDn) to jump down the document one window at a time.
Challenge!
- Notice the Insertion point at the beginning of the document.
- Using the methods described in this lesson, test the insertion point's move ability.


