

PowerPoint XP
Spell Check and Printing
Introduction
By the end of this lesson, learners should be able to:
- Use Spell Check
- Print Slides
- Print Handouts
- Print Notes Pages
- Print Outline
Using Spell Check
The Spell Check tool allows you to check your entire presentation for spelling errors. PowerPoint has a dictionary that you can customize with words typically not included in a standard dictionary.
To Use the Spell Check Tool:
- Click on Tools
 Spelling.
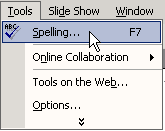
OR
- Click the Spelling button on the Standard Toolbar.

Scanning for Errors
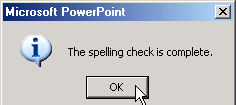
Once you launch the Spell Check tool, a couple of scenarios can occur:
- PowerPoint quickly scans your presentation, searching for words that aren't in its dictionary. If there are no recognizable errors, a dialog box will appear stating that the spelling check is complete.
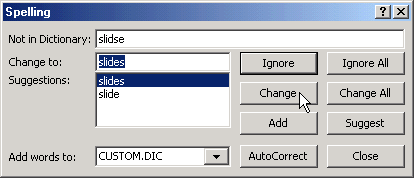
- If there are possible spelling errors, the Spelling dialog box opens and offers you a number of options. Any unrecognized word appears in the Not in Dictionary box.
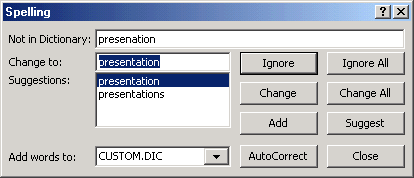
Spell Check Options
You can choose from one of the options in the Spelling dialog box:
- Ignore - the word is correct and does not need to be added to the custom dictionary.
- Ignore All - ignore all occurrences of the word.
- Change - correct the word.
- Change All - change all occurrences of the spelling of a word.
- Add - add a word to the custom dictionary.
- Suggest - PowerPoint suggests possible correct spellings of a word. Scroll through the list to find the correct spelling. Select the appropriate one and click the Change button.
- AutoCorrect - automatically corrects many common spelling, typing, and grammatical errors.
Once the entire presentation has been checked for spelling errors, and you have made your corrections or changes, click Close.
 The Spell Check tool does not catch all errors. Be sure to read through your text carefully to find any typographical errors.
Previewing and Printing
Once you've corrected any errors in your document, it's time to print. PowerPoint XP allows you to preview your presentation before you print. You can preview and print slides, handouts, notes pages and outlines.
To Preview and Print a Presentation:
- Click on File Print Preview.
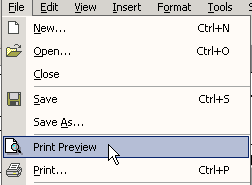
OR
- Click the Print Preview button on the Standard Toolbar.

- On the Print Preview Toolbar, click the down-pointing arrow next to the Print What box.
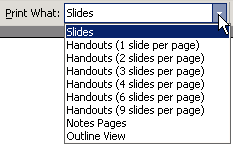
- Select the layout that you want to preview and/or print.
- Click the Close button to return to the presentation or choose Print to print the layout.
Printing a Slide Presentation
If you don't want to preview your presentation in the various formats, you can simply print it.
To Use the Spell Check Tool:
- Click on File Print.
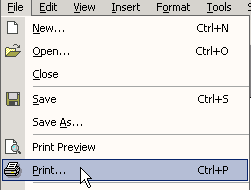
- The Print dialog box opens.
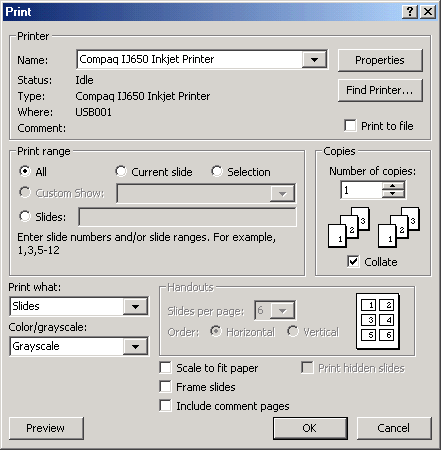
- Click the down-pointing arrow next to the Print What box.
- Choose Slides, Notes, Handouts, or Outline.
- Select the print range and number of copies.
- Click OK.
Challenge!
- Open the presentation, Tips for Getting Organized.
- Use Spell Check to check spelling.
- Make any necessary corrections.
- Preview Handouts (6 slides per page).
- Print Handouts.