

PowerPoint 2010
Advanced Presentation Options
Customizing your slide show
Sometimes you might want to hide a slide while still keeping it in your presentation. For instance, if you are presenting a slide show to more than one group of people, hiding or even rearranging certain slides could help you tailor your slide show to each group you present it to. You could also choose to create a shortened version of your slide show to present when you're short on time. The Custom Slide Show feature allows you to create and name different versions of your slide show with hidden or rearranged slides.
To create a custom show:
- Select the Slide Show tab, and locate the Start Slide Show group.
- Click the Custom Slide Show command.
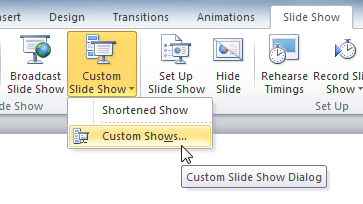 The Custom Slide Show command
 - Select Custom Shows.... The Custom Shows dialog box will appear.
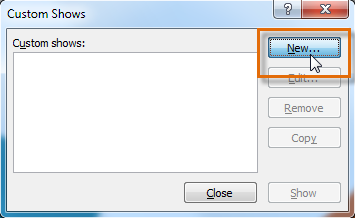
- Click New. The Define Custom Show dialog box will appear.
 Creating a new custom show
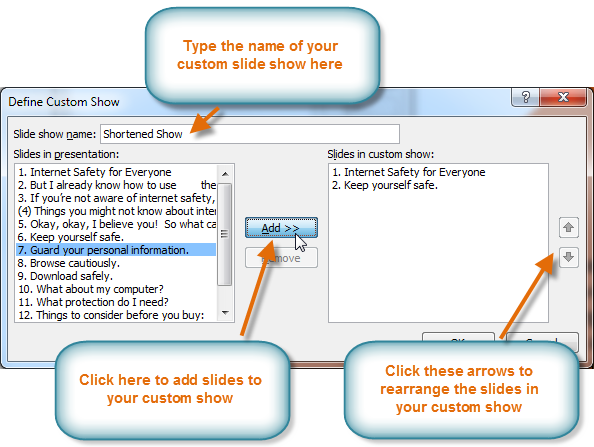
 - Locate the Slide show name box, and type in a name for your custom show.
- Select the slides in the Slides in presentation: box that you would like to include in your custom show, then click Add>> to add them to the Slides in custom show: box. If necessary, use the up and down arrows to reorder the added slides.
 Adding slides to the custom show
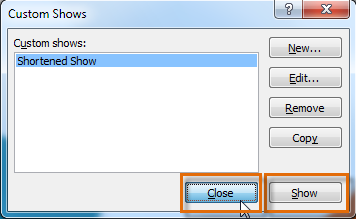
 - Click OK.
- Select Close to exit or Show to view your custom show.
 Closing the Custom Show dialog box
You can also hide slides by selecting the Hide Slide command, which can be found on the Slide Show tab. To unhide a slide, simply click the Hide Slide command again.
 The Hide Slide command
Creating handouts of a presentation
Printing handouts with images of your slides can be helpful to your audience, as it gives them a hard copy of the information you're presenting. Plus, they can take notes on the handouts as you present your slide show.
To create handouts of a presentation:
- Click the File tab. This takes you to the Backstage view.
- Click Print.
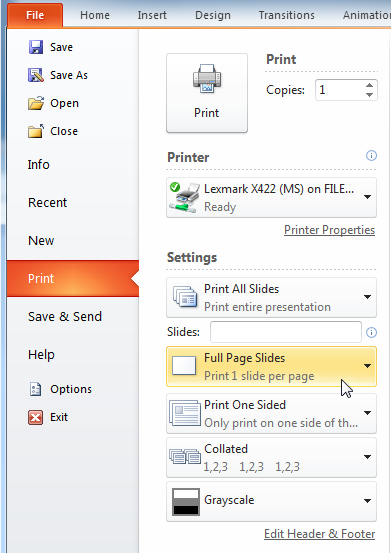 The Print tab in the Backstage view
 - Click the drop-down arrow in the box that says Full Page Slides, and locate the Handouts group.
- Select a page layout for your handouts. Up to nine slides can be displayed per page. Note that the 3 slides layout offers lined space for your viewers to take notes.
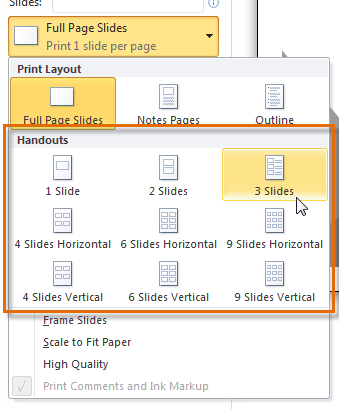 Selecting a handouts layout
 - Click the Print command.
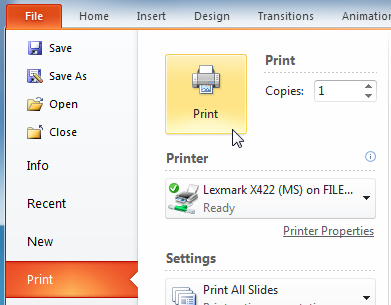 Printing the handouts
If you would like to add a header or footer to your handouts, click the View tab on the Ribbon, then select Handout Master. Just type your header or footer information into the boxes provided. To return to the normal view, click Exit Master View.
 The Handout Master View command


