

Photoshop Basics
Levels, Curves, and Color
Auto-adjustment tools
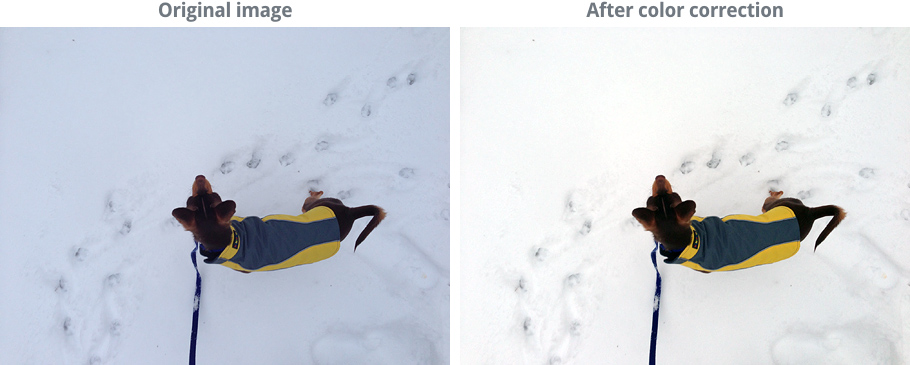
Some images may require more specialized corrections, which can be difficult to make if you don't have a lot of experience with Photoshop. Fortunately, there are several automatic adjustment tools you can use to improve your images. In the original image below, the snow has a blueish tint; after using the Auto Color command, the snow looks white:
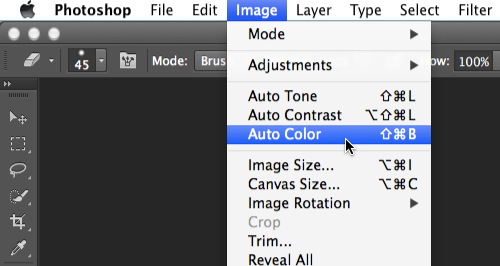
You'll find a few auto-correction tools, including Auto Color, in the Image menu.
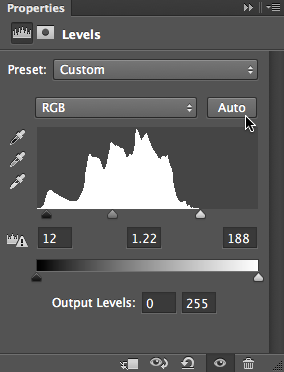
Many adjustment layers also have their own automatic adjustment option. To use this tool, create an adjustment layer, then click the Auto button in the Properties panel (if available).
Most of the time, these tools will improve the overall look of an image. However, you can always manually adjust an image afterward to get the image to look exactly the way you want. If the auto-correction goes too far, you could also try reducing the opacity of the adjustment layer to 50% to make the effect more subtle.
Open the dog_fullsize.jpg example file, add a Levels adjustment layer, and use the Auto Color command in the Image menu.


