Photoshop Basics
Saving Images
Using Save As
You'll use the Save As command to save files in the PSD format, as well as other common formats like JPEG and PNG.
To save a file with Save As:
- With the image open in Photoshop, select File
 Save As.
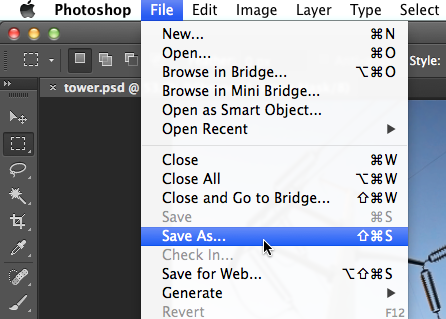
- A dialog box will appear. Type the desired file name, then choose a location for the file. You'll want to use a new file name to avoid accidentally overwriting the original file.
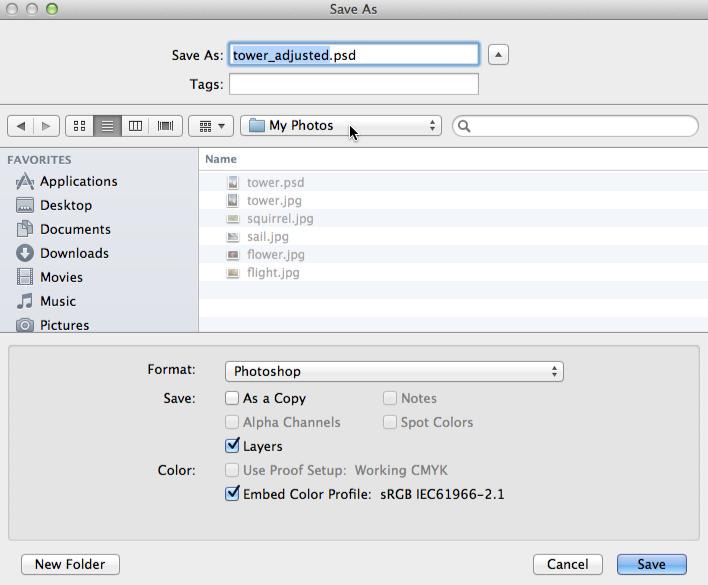
- Click the Format menu and choose the desired file format. In our example, we'll save this image as a JPEG file. If you're saving as a PSD file, make sure the Layers option is checked. However, most other formats won't allow you to select this option.
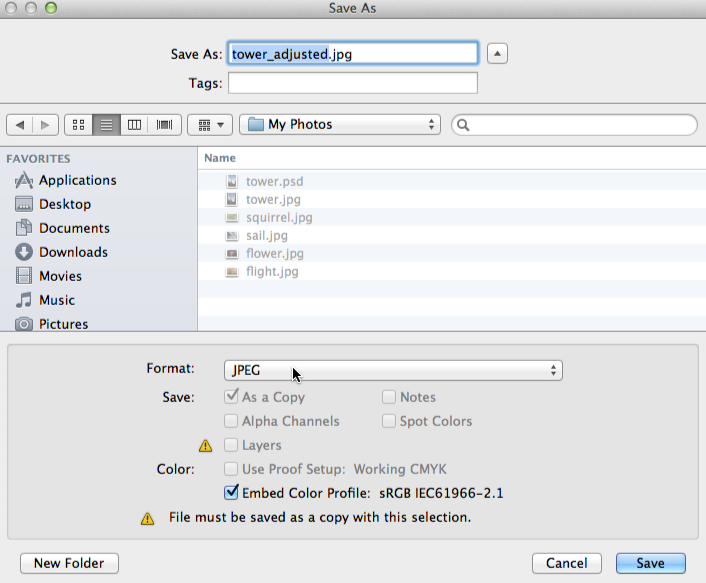
- Click Save.
- Some file formats, such as JPEG and TIFF, will give you additional options when saving. Select the desired quality level, then click OK to save the image.

If you've already saved your project as a PSD file, you can select File Save or press Ctrl+S (Command+S on a Mac) to save your progress at any time. However, if you're working with another format such as JPEG, we recommend using Save As to avoid overwriting your original file.
Open the example file in Photoshop and then try saving in different file formats, such as PSD and JPEG. Notice how the PSD format preserves the individual layers, while the JPEG format does not.
Using Save for Web
When you use the Save for Web feature, you'll need to make a few decisions about the image you're saving:
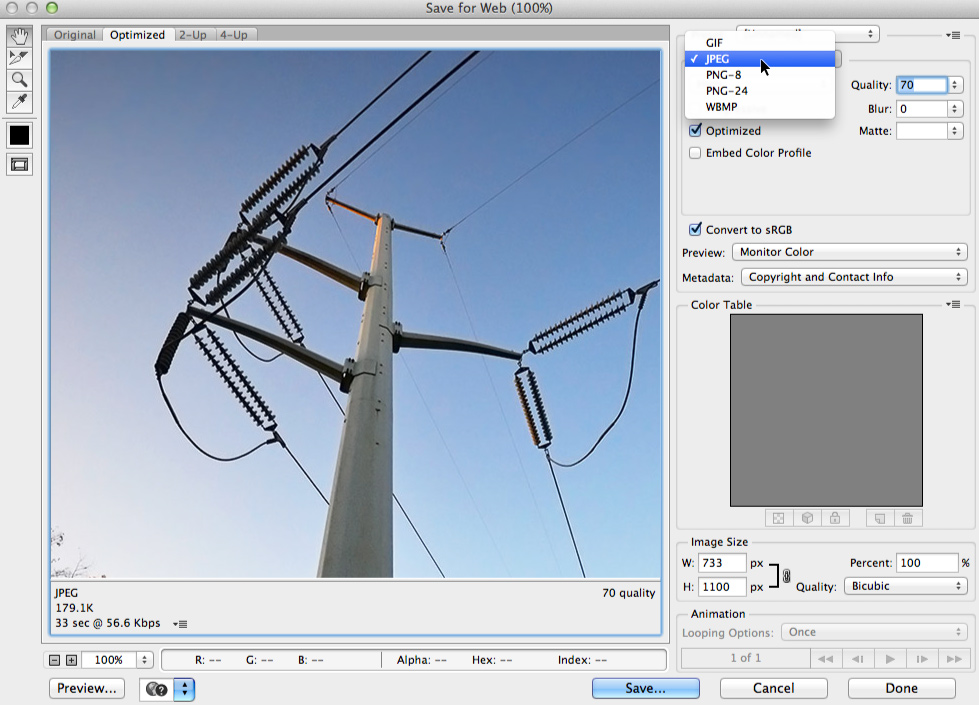
- File format: Save for Web allows you to choose from a few Web-safe file formats. Most of the time, you'll use the JPEG format for photographs. PNG-24 will keep the full quality of the image, whereas PNG-8 is mainly used for graphics and illustrations that use just a few colors. Generally, you won't need to use the GIF or WBMP formats.
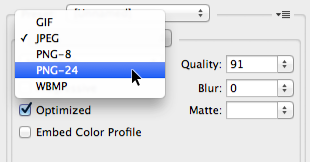
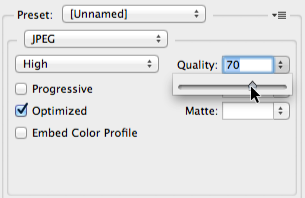
- Quality: If you're using the JPEG format, the image can be saved at different quality levels. You may want to experiment with different settings to find the best balance between quality and file size.
- Image size: If desired, you can resize the image directly from the Save for Web dialog box. Resizing the image to be smaller will also reduce the file size. However, if you're using a service like Facebook or Tumblr, you probably won't need to resize your images because these services resize them automatically.

To save for the Web:
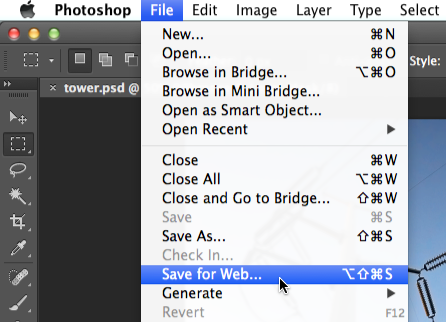
- Select File
 Save for Web.
- The Save for Web dialog box will appear. Select the desired file type and quality level.
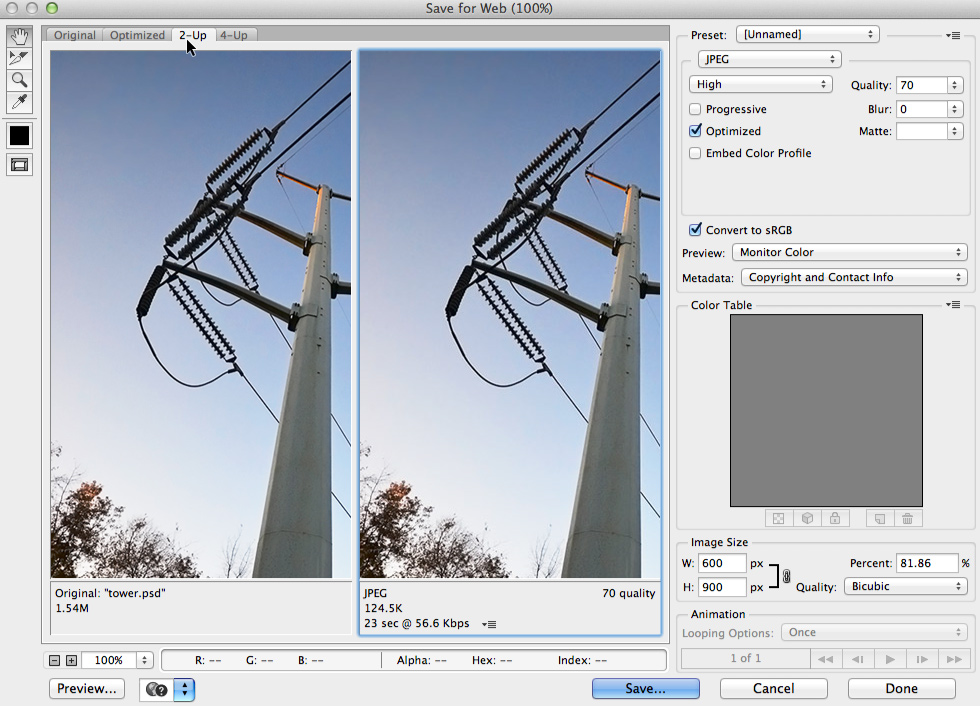
- If needed, resize the image by typing the desired dimensions under Image Size. When you enter the new image width, the height should be adjusted automatically to maintain the original aspect ratio.
- If desired, you can use the 2-Up view to compare the original image with a preview of the new version. This is an easy way to make sure you haven't lost too much quality from the original version. Note the file size in the bottom-left corner of each preview window.
- Click Save. A new dialog box will appear. Type the desired file name and choose a location for the file, then click Save. You'll want to use a new file name to avoid accidentally overwriting the original file.

Open the example file in Photoshop and use Save for Web to save a new version of the image. Try out different file formats and quality settings to see how they affect the image's quality and file size.


