

Outlook 2010
Organizing and Managing Email
Using categories
Categories can make it easier to find and organize your messages. Applying a category is much like moving a message to a folder, but with one important difference: You can apply multiple categories to any message. For example, if you received a message about an upcoming sales meeting, you could apply both the Sales and Meetings categories. Categories are designed to work any way you want—it's easy to rename categories, choose new category colors, and even create new categories.
To customize categories:
Outlook 2010 offers six default categories, which are named according to their colors. You may want to customize the category names before you start using them to organize your messages.
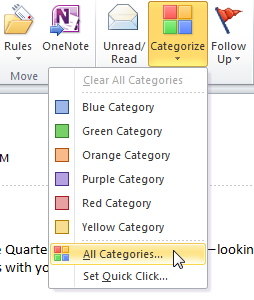
- Locate and select the Categorize command on the Ribbon, then select All Categories... from the drop-down menu.
 Customizing default categories
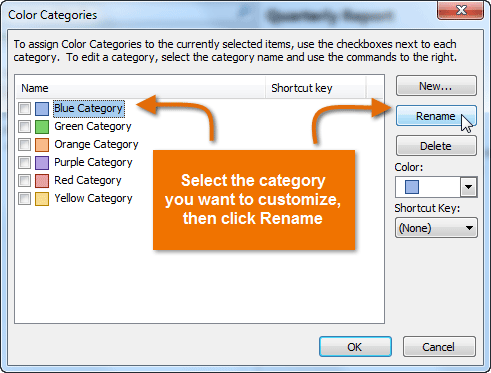
 - The Color Categories dialog box will appear.
- Select the desired category, then click the Rename button. In this example, we'll rename one of the default categories to help organize messages about upcoming staff meetings.
 Renaming a category
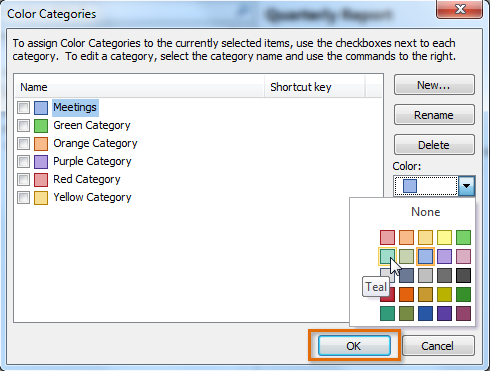
 - Type the new name for the category. You can also select a new color if you prefer. Once you're satisfied with the changes, click OK.
 Adding a custom category name and color
 - The customized category will appear in the categories list.
 The customized category
To apply a category:
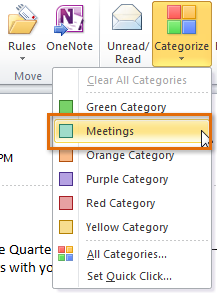
- Select the desired message, then click the Categorize command on the Ribbon.
- Select the desired category from the drop-down menu.
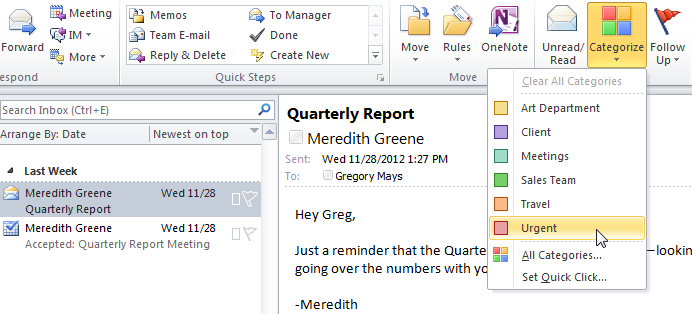 Applying a category
 - The category will be applied to the message and visible in both the View and Reading panes.
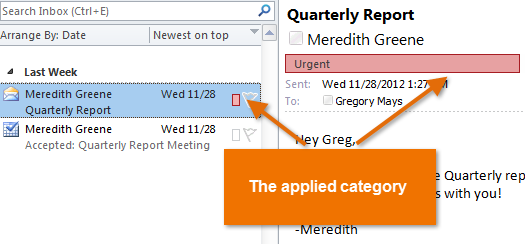 The applied category in the View and Reading panes
To filter messages by categories:
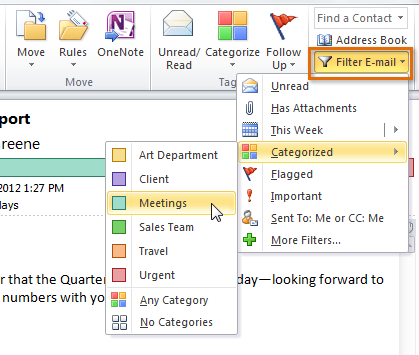
Once you've applied categories to some of your messages, you can easily view all of the messages in any given category by using a filter. For example, you may wish to view messages in the Meetings category so you can see everything that pertains to an upcoming meeting.
- Locate and select the Filter E-mail command on the Ribbon, hover over Categorized, then select the desired category from the drop-down menu.
 Filtering by category
 - Messages matching the selected category will appear in the View pane.
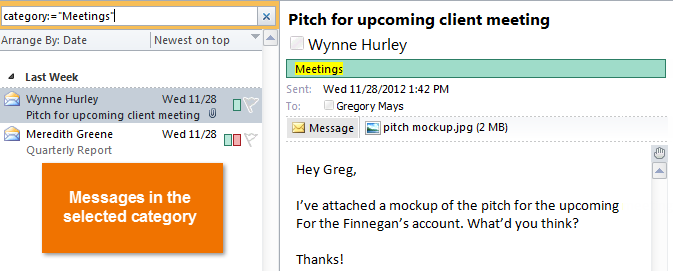 Messages filtered by category


